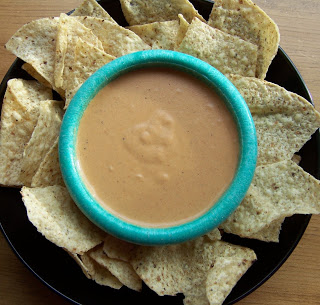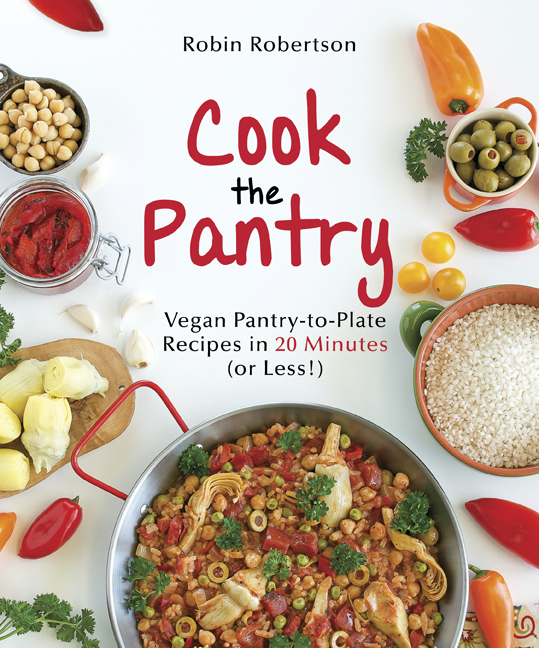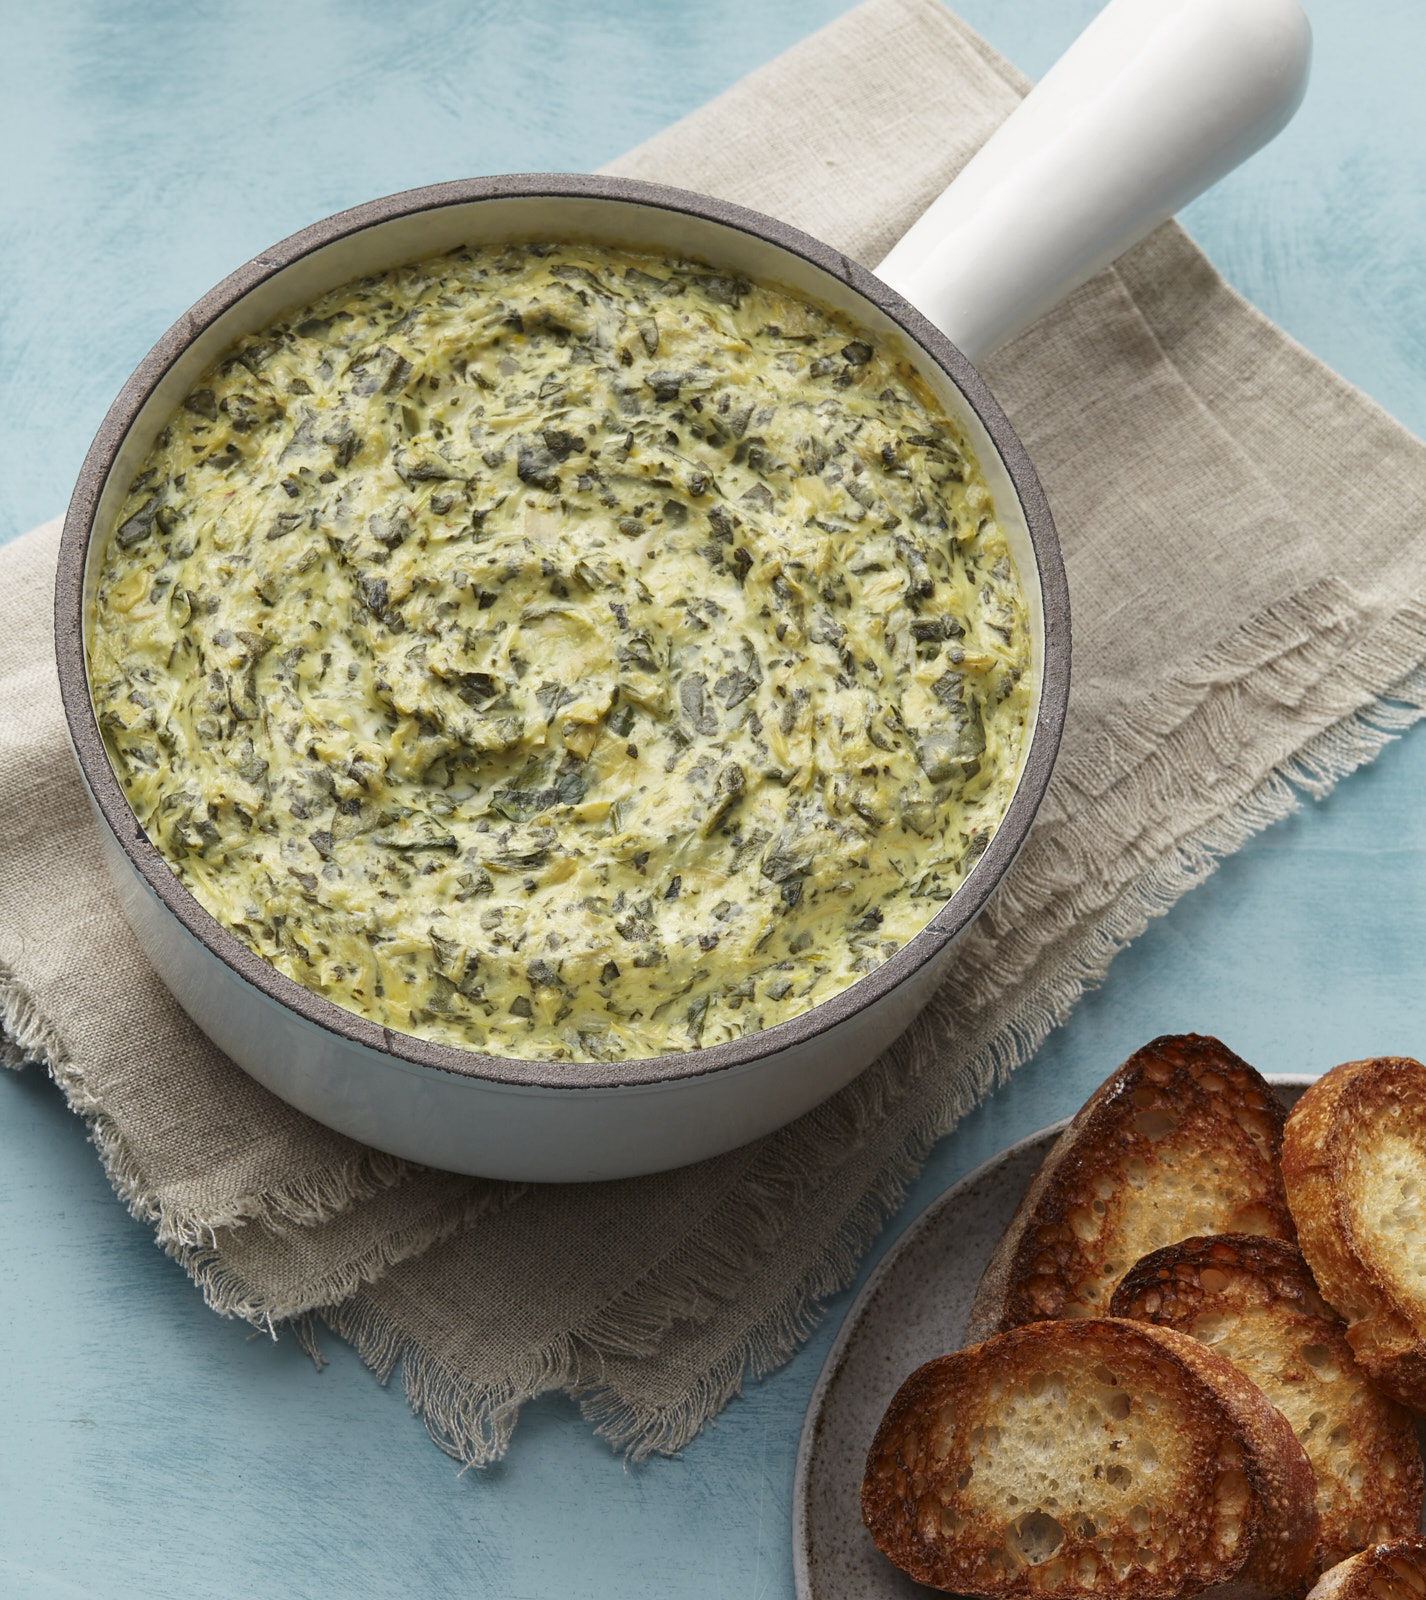
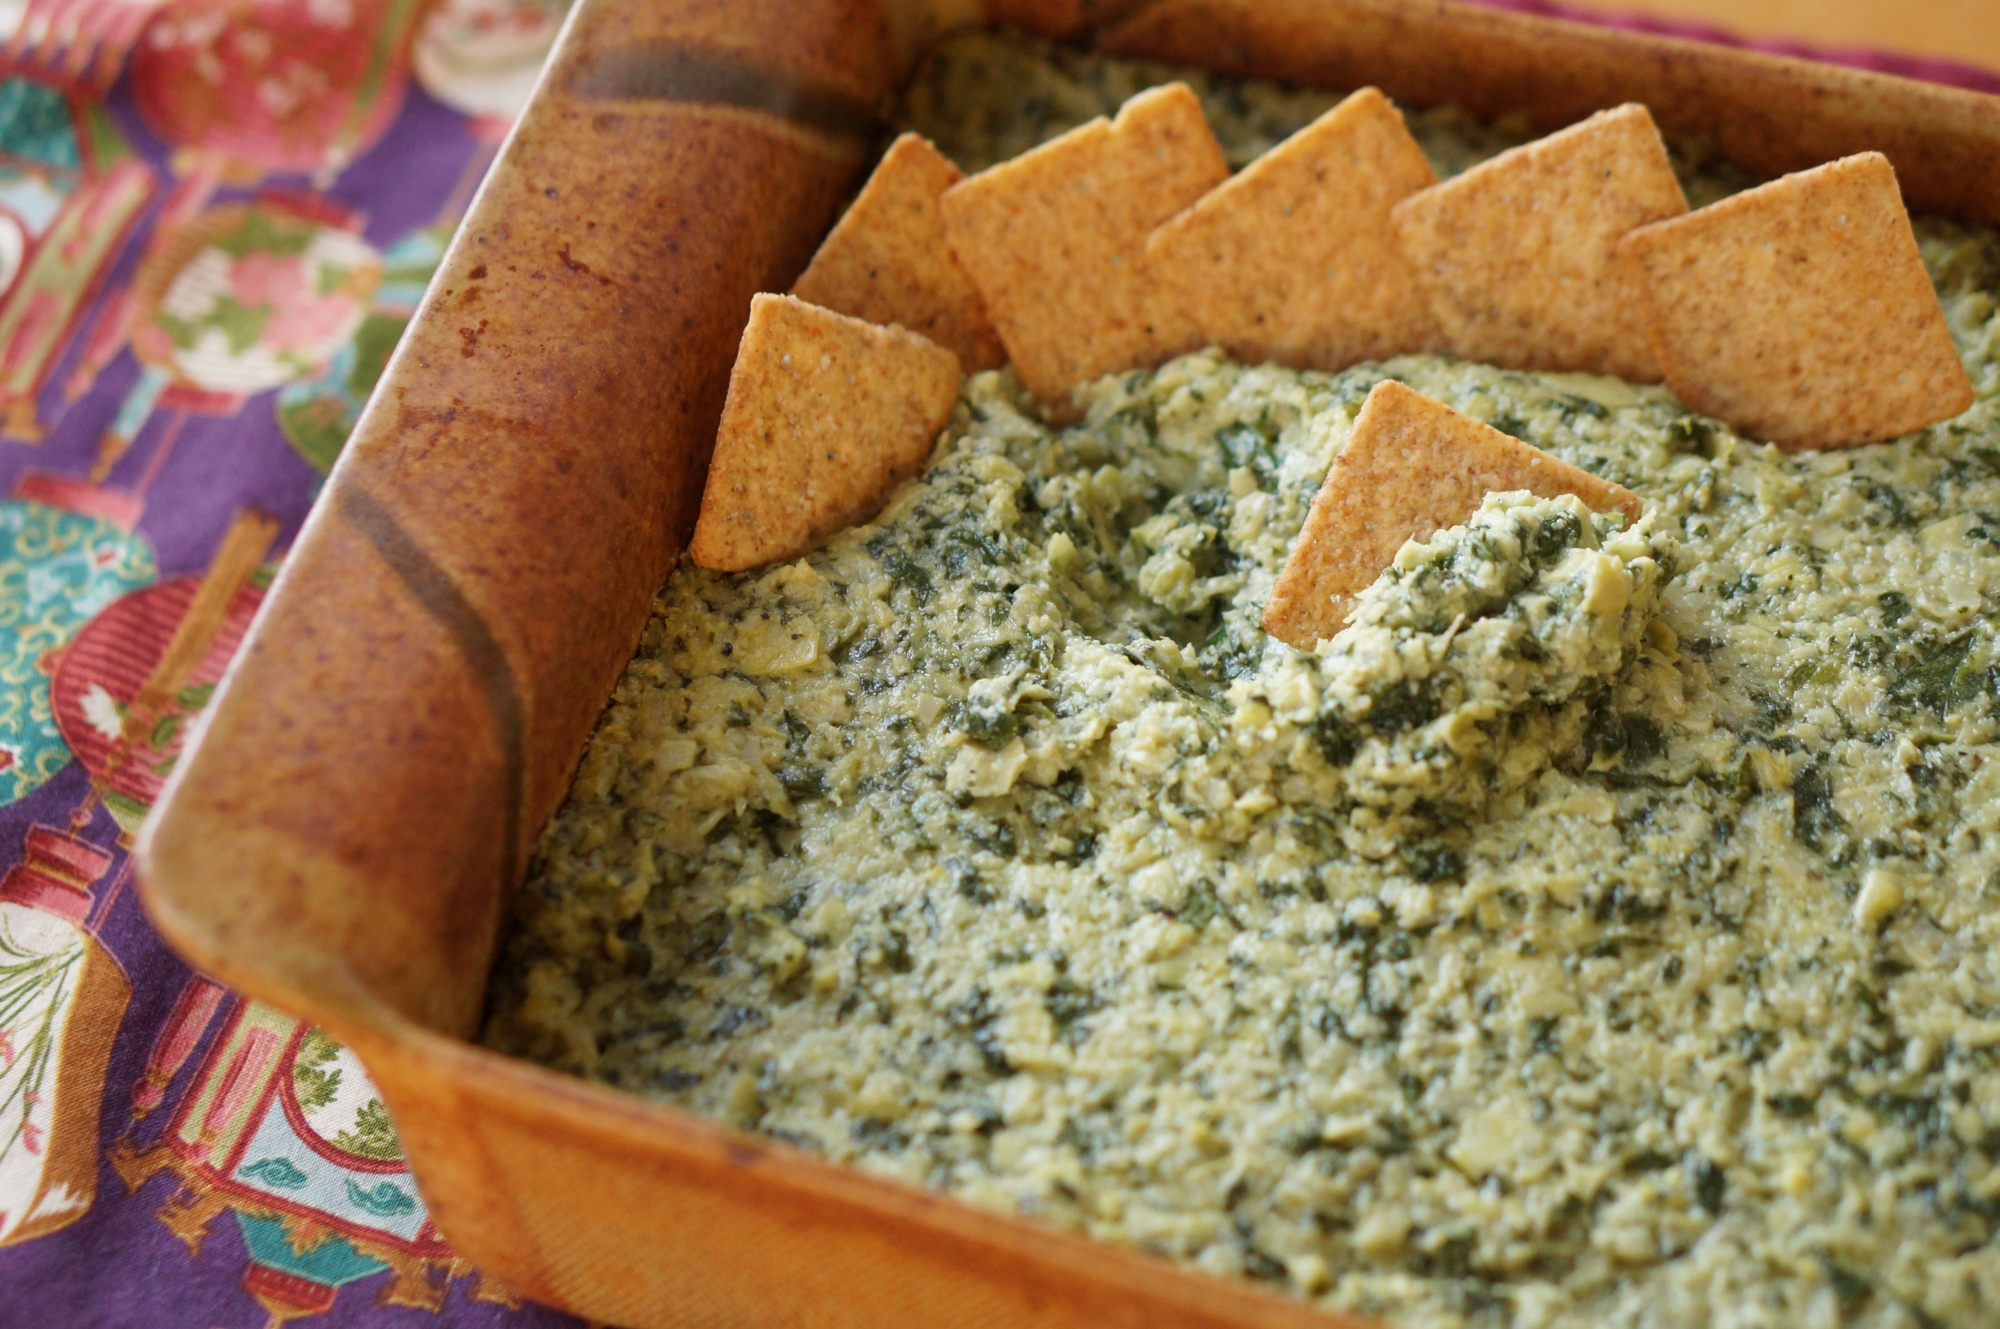
Artichoke-Spinach Dip
I love anything with artichokes: grilled fresh baby artichokes are the beyond compare. When I can’t get fresh artichokes, I satisfy my craving with frozen, jarred, or canned. I like to put marinated artichoke hearts in salads and that the creamy and delicious artichoke-spinach dip is a longtime favorite. In fact, I’m such a fan of that dip that I’ve developed a few other ways to use it such as a pasta sauce, or as a tasty filling for palmiers.
First, the dip itself. Sometimes I make it with a homemade cashew cream cheese (see Veganize It!), but more often than not, I opt for saving time and use a commercial vegan cream cheese. The dip is quick and easy to make and can be made ahead of when you need it. You can pop it in the oven just before serving time or do what I usually do: heat it in a small slow cooker.
Artichoke-Spinach Dip
1 (10-ounce) bag baby spinach, lightly steamed, then squeezed dry
1 cup vegan cream cheese
1 tablespoon fresh lemon juice
1/4 cup nutritional yeast
3/4 teaspoon onion powder
1/2 teaspoon garlic powder
3/4 teaspoon salt
1/4 teaspoon ground black pepper
2 (12 -ounce) jars marinated artichoke hearts, well drained and blotted dry
Preheat the oven to 400 degrees °F.
Lightly steam or microwave the spinach for 1 minute or until wilted. Allow to cool.
Combine the cream cheese, lemon juice, nutritional yeast, onion powder, garlic powder, salt, and pepper in a food processor. Blend until very smooth.
When the spinach is cool enough to handle, squeeze any liquid from it and add it to the mixture in the food processor. Add the artichokes and pulse to combine, leaving some texture. Do not over-process.
Transfer to an ovenproof baking dish, and bake uncovered for 15 minutes, or until hot. Remove from the oven and let cool slightly. Serve with toasted French bread slices or your favorite crackers.
Makes about 3 cups
Slow Cooker Variation: Instead of baking in the oven, transfer the dip to a small (1 quart) slow cooker and cook on High for about 2 hours, or until hot.
As a pasta sauce: To transform this dip into a great pasta sauce, simply thin it out with your favorite unsweetened plant milk until it’s the perfect consistency. Then, add a little more onion powder, maybe some more nutritional yeast, and a little extra salt and pepper. Heat until warm and toss with freshly cooked pasta.
Palmier filling: Another favorite way to enjoy the creamy goodness of artichoke-spinach dip is to use it as a filling for these light and flaky palmiers, made with vegan puff pastry, available in the freezer case of most supermarkets. Best of all, these palmiers freeze well, so if you only need enough for a few people, you can freeze the second roll (unsliced) and thaw when needed.
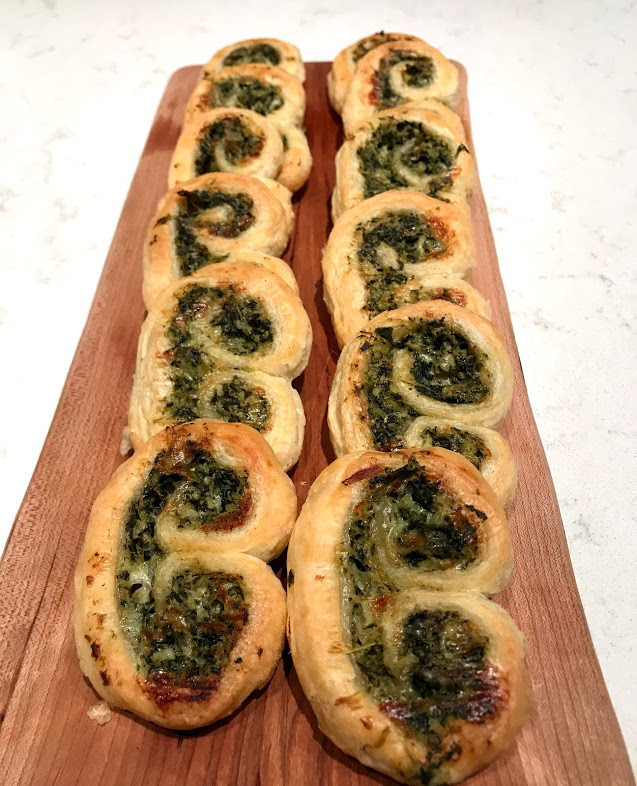
Artichoke-Spinach Palmiers
1 recipe Spinach-Artichoke Dip (see above)
1 package frozen puff pastry, thawed (Pepperidge Farm brand is vegan)
Unfold one sheet of puff pastry onto a flat work surface. Spread half of the artichoke-spinach mixture onto the pastry sheet, spreading to within 1/2 inch of the edges. Roll up one long side of the dough to the middle of the dough, then roll up the other side of the dough so the two rolls meet in the center. Repeat with the remaining dough sheet and filling mixture. Refrigerate for 45 minutes.
Preheat the oven to 400°F. Using a serrated knife, cut each roll into slices, slightly less than 1/2-inch thick. Place each slice, cut-side down, on parchment-lined baking sheets, allowing about 1-inch of space in between each slice. Use a metal spatula to flatten the palmiers to 1/4-inch thickness. Bake for 20 minutes or until golden brown. Serve warm.