≡ Menu

Quick-Fix Vegan Giveaway — and Last Week’s Winner!

The winner of this week’s “Make My Monday” cookbook giveaway, chosen randomly is #12, VeggieAmanda, whose favorite pantry ingredient is nutritional yeast.  Congratulations!!!  Send me an e-mail with your mailing address and I’ll get a copy of Vegan Unplugged right out to you.

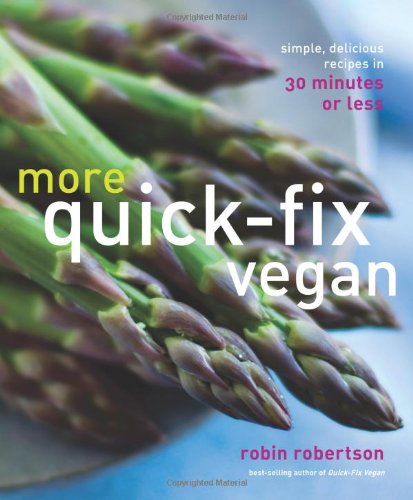
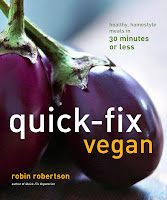
For my final cookbook giveaway during VeganMoFo, I am giving away a copy of my brand new cookbook: Quick-Fix Vegan: Healthy, Homestyle Meals in 30 Minutes or Less.  If you’ve been following my blog, you’ve seen loads of amazing tester photos from this book, as well as a few sample recipes.  I’ve also posted a list of many of the recipe titles here.

If you already enjoy my other 30-minute cookbook, Quick-Fix Vegetarian, then you’ll love this all new “companion volume” Quick-Fix Vegan. (Yes, these are TWO DIFFERENT cookbooks!) 

Okay, so how do you win a copy?  Simple: just leave a comment at the end of this post that answers this question: “Why would you like to win a copy of Quick-Fix Vegan?”

That’s it! One lucky winner will be selected at random. And if you want to increase your chances, you can do any or all of the following, and leave a comment for each that you do:
1. Follow me on Twitter: @GlobalVegan
2. Link to this giveaway on Twitter

3. Link to this giveaway on Facebook
4. Link to this giveaway on your blog 
5. Subscribe to this blog
6. “Like” Quick-Fix Vegan on Amazon
The contest closes Sunday night 10/30 at midnight.  The winner will be announced next Monday 10/31. So, tell me, why do you want to win a copy of Quick-Fix Vegan?
{ 1 comment }

What’s In the Slow Cooker?

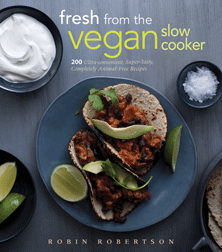
These days, you’re liable to find just about anything in the slow cooker, not just at my house, but also at the homes of the recipe testers (like this one, making three recipes at once for my upcoming slow cooker cookbook). The variety of recipes includes several stuffed vegetables, like this stuffed squash:

Loads of great soups, chili, and stews, like this hearty posole:

 Lots of amazing vegetable recipes — even corn on the cob:


An assortment of jams, chutneys, relishes, and other condiments, including this ginger cran-apple chutney:

And this gorgeous orange marmalade:

There are even quite a few desserts coming out of our slow cookers, like this chocolate truffle cake:

Happy Slow Cooker Sunday!

{ 0 comments }

Come for the Cheesecake, Stay for the Cat House

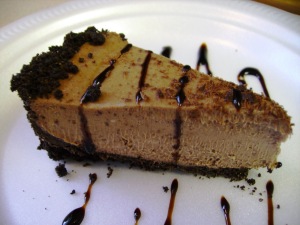
During VeganMoFo I designated Saturday on my blog as “Sweet Tooth Saturday,” so here is a photo of the sublimely delicious (as well as quick and easy) chocolate cheesecake from Quick-Fix Vegan.  In the book, the cheesecake is made in a square pan, although it can also be made in a springform pan as in this tester photo (shown here with a drizzle of balsamic glaze — thanks, Lea!).

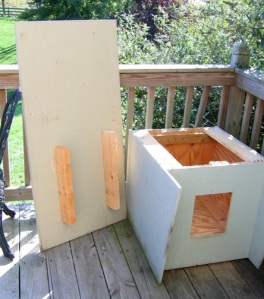
Today is also “Caturday” which brings us to the real star of today’s post: the custom house that Jon built for Jason, the semi-feral cat that shares our property and our hearts.  Several people asked to see photos of Jason’s house and I’m happy to oblige. As you can see in this first photo, Jon designed the roof to have a wide overhang in the front so that Jason can eat and drink in the shade when it’s hot and stay dry when it rains or snows.  The sides of the house extend in the front a bit as well, against the wind.  Jason like to relax on the flat roof in the summer.

Jon made this house with some plywood and 2x4s.  It’s solid, and the removeable roof is great for cleaning out the house.  The interior is easy to insulate during cold weather. In the warmer months I put in an outdoor chair cushion for Jason to sleep on, usually with a towel on top that I replace frequently, especially if it’s rainy to avoid dampness in his house.

In the colder months, I put one of those cat “cubes” inside and insulate around the sides and bottom.  I also place a sheet of thin silver “astronaut” blanket that I fold inside a soft towel for Jason to sleep on which creates added warmth from his body heat, even in the winter. This photo shows the inside with the roof off:

We’ve positioned the house just a few feet across from our back door so I can keep tabs on Jason and also so he can feel like he’s part of the family.  He likes to hang with Gary at the back door.

If you’re not handy with a hammer, you can buy a ready-made shelter, but even if you’re not a master carpenter, there are lots of simple house designs you can find like these from the Maryland Feline Society.  There are also some great tips for helping feral cats in the winter on Alley Cat Allies.

{ 1 comment }

White Bean Pizza from VOTC

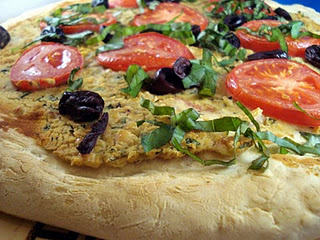
For this week’s “Flashback Friday” we revisit the pleasures of the Tuscan White Bean Pizza from Vegan on the Cheap.  This insanely delicious pizza recipe is extremely popular among fans of VOTC and it’s no wonder:  it tastes fabulous and is ideal for cooking vegan “on the cheap,” because it doesn’t call for any expensive vegan cheese.  Instead, it has a creamy garlicky bean topping that is low in fat, high in protein, and, best of all, cheap to make. Remember, all the recipes in Vegan on the Cheap cost between 50 cents and two dollars to make, so you can easily eat wonderful vegan meals for just a few dollars a day.
As I mentioned the first time I posted this recipe, you can make the pizza dough using white whole wheat flour, but you can use anything from regular all-purpose flour, to half whole-wheat/half a.p. flour, to your favorite gluten-free flour blend. You can also add some dried herbs to the flour mixture when making the crust for added flavor. If you want to include extra toppings, here are some ideas:  (Keep in mind that certain toppings, such as olives and artichokes, are pricier than others and will add to the cost of the pizza.)
Topping ideas:
vegan pepperoni slices (recipe in Vegan on the Cheap)
roasted or grilled vegetables
tossed baby greens salad with a light vinaigrette
crumbled vegan sausage and marinara sauce (recipes in Vegan on the Cheap)
sliced artichoke hearts and tofu feta (recipe in Vegan on the Cheap)
hummus, sliced tomatoes, and sliced pitted kalamata olives 

And, finally, here is the recipe:
Tuscan White Bean Pizza
Makes 1 (12-inch) pizza
(Recipe from Vegan on the Cheap by Robin Robertson © 2010, John Wiley and Sons.)
Dough:
2 3/4 cups all-purpose flour
2 1/4 teaspoons instant yeast
1 teaspoon salt
1 cup lukewarm water
Topping:
2 tablespoons olive oil
3 garlic cloves, finely minced
1 1/2 cups cooked or 1 (15-ounce) can cannellini beans, drained and rinsed
1/4 teaspoon salt
1/4 teaspoon freshly ground black pepper
1/3 cup water or vegetable stock
3 tablespoon chopped fresh basil leaves
2 ripe plum tomatoes, thinly sliced
1. Make the dough: In a large bowl, combine the flour, yeast, and salt.  Stir in the water until combined then use your hands to knead it into a soft dough.
2. Transfer the dough to a lightly floured work surface and knead until it is smooth and elastic, about 10 minutes, adding additional flour as needed so it doesn’t stick. Shape the dough into a smooth ball and place in an oiled bowl. Cover with plastic wrap and let rise at room temperature in a warm spot until double in volume, about 1 hour.
3. After the dough has risen, transfer it to a lightly floured work surface, punch it down and gently stretch and lift it to make a 12-inch round about 1/4-inch thick. Transfer the round to a floured baking sheet or pizza stone.  Let the dough rise in draft-free place for 20 minutes. Adjust the oven rack to the bottommost position of the oven.  Preheat oven to 425 degrees F.
4. Make the topping: In a large skillet, heat the oil over medium heat. Add the garlic and cook until softened, about 2 minutes.  Add the beans, salt, and pepper. 
5. Mash the beans to break them up, then stir in the water and simmer, stirring occasionally, until the mixture is creamy, about 8 minutes.  Stir in the basil and set aside.
6. To assemble the pizza, spread the bean mixture evenly on top of the dough round, to within 1/2-inch of the edge.  Arrange the tomato slices on top and season with salt and pepper to taste.  Bake until the crust is browned, 12 to 15 minutes. Serve hot.
Splurge a little: Add sliced pitted kalamata olives when you add the tomatoes.  Garnish with thin strips of fresh basil leaves.
{ 1 comment }

Mac and Cheddar Cauliflower

On this “Food for Thought” Thursday, the subject is cauliflower, specifically Mac and Cheddar Cauliflower. I don’t mean mac + cheddar + cauliflower – I mean macaroni with “cheddar cauliflower” – a gorgeous pale orange colored cauliflower that proved to be an ideal ingredient in my latest foray into the developing the perfect vegan mac and cheese.

In mac and cheese recipes over the years, I’ve used everything from potatoes and carrots and roasted red, orange, and yellow peppers to add that “cheesy” color to mac and cheese.  I had been experimenting with a new version using cauliflower anyway, so when I saw the gorgeous orange crucifer labeled “cheddar cauliflower” I knew I had to get it and how I’d be using it.

Here, then, is the recipe for “Mac and Cheddar Cauliflower” – of course the recipe works just as well with white cauliflower – the pimientos, mustard, and nutritional yeast all combine to add color to the dish, but if you’re fortunate enough to find a cheddar head, it’s really fun to use in this mac and cheese recipe. As you can see in the photo, the top of the casserole is strewn with extra pieces of roasted cauliflower goodness.

Mac and Cauli
I realize there are a lot of “or more”s in this recipe – that’s because you get to make mac and cheese just the way you like it – as saucy as you want it, as cheesy as you like.  You can even add some shredded Daiya cheddar if you want to, but I’ll take my cheddar…cauliflower!

1 small (“cheddar” or white) cauliflower, cored, trimmed and cut into 1/4-inch slices
12 ounces elbow macaroni
2/3 cup cashews, soaked for 4 hours or overnight, then drained
2 cups vegetable broth, or more
2 teaspoons olive oil
1 small onion, chopped
2 garlic cloves, minced
Salt and black pepper, to taste
1/3 cup nutritional yeast, or more
1 (4-ounce) jar diced pimientos, drained
2 tablespoons fresh lemon juice, or more
1 teaspoon yellow mustard, or more

Preheat the oven to 425 degrees F.  Arrange the sliced cauliflower on an oiled baking sheet and roast until soft and lightly browned, turning once, about 20 minutes.  Set aside. Reduce the oven temperature to 350 degrees F.
White the cauliflower is roasting, cook pasta in a pot of boiling salted water until al dente.  Drain well and set aside.
In a food processor or high-speed blender, combine the cashews and broth and blend until smooth.
Heat the oil in a small skillet over medium heat. Add the onion and cook until softened, about 5 minutes.  Add the garlic and cook 1 minute longer.  Transfer the onion mixture to the food processor with the cashew mixture. Add 2 cups of the roasted cauliflower and puree until smooth. Add the nutritional yeast,pimientos, lemon juice, and mustard.  Season to taste with salt and pepper — the amount of salt needed depends on how salty your broth is.  I usually add about 1/2 teaspoon of salt to start. Process to blend well, then taste and adjust seasonings, adding more salt if needed. Now, here’s the part where personal preferences comes into play:
·        If you prefer a thinner sauce: add up to 1 cup of additional vegetable broth or your favorite plain unsweetened nondairy milk. 
·        If you want a “sharper” flavor: add more lemon juice and/or mustard, a little at a time, mixing well after each addition.
Now for the final texture preference:
For a non-saucy (but flavorful) texture, transfer all of the cooked pasta to a lightly oiled baking dish. 
For a saucy texture, transfer one-half to two-thirds of the cooked pasta to the baking dish and pour in the sauce, stirring to coat. It will be very saucy, but the pasta will absorb some of the sauce. 
If you like a saucy texture with no crumb topping, cover tightly and bake for 20 minutes or until hot. If you like a crunchy crumb topping, sprinkle the top with toasted panko crumbs and bake an additional 10 minutes.
For an even saucier version, omit the baking step altogether, and combine the pasta and sauce on top of the stove (in whatever proportions you prefer) and heat until hot. 

Note: If you were able to find cheddar cauliflower, sprinkle the top of the casserole with any remaining “crumbs” of roasted cauliflower – it tastes delicious and looks good, too!

Another note:  To add some color (and more veggies) stir in 1 to 2 cups of a cooked green vegetable such as chopped broccoli or asparagus, or thawed frozen green peas.

While we’re on the subject of cauliflower, be sure to visit OneGreenPlanet for my recipe for Cauliflower Picatta. It’s so delicious, it could make a cauliflower lover out of almost anyone.  Try it and see. (Also please “Like” the recipe on OneGreenPlanet and share it on Facebook and Twitter.)

{ 5 comments }

Wildcard Wednesday: A Guest Post

In the true spirit of Wildcard Wednesday, the following is a guest post by a friend who lives and works on the other side of the world in a “dry” land. The post chronicles his experience making his own artisanal fermented beverage, aka “moonshine.”
I’m friar Loshlane and my sidekick is friar Pumpernickel. We are not real friars, but to maintain anonymity in our rebellious endeavors, in a land reflective of the prohibition years in America, we thought it best to exercise discretion while sharing the story of the birth and development of our baby. Born on September 5th, she is five gallons (somewhat less now) of bubbling, breathing, discharging, joy. Meet Miss Mead! 
Friar Pumpernickel and I used a traditional uncooked mead recipe as our guide. We believe if ancient orders could concoct relatively safe beverages worthy of religious celebration, neither should we require modern apparatus and tedious technique. According to one source, the first mead was gathered, not made by humans. Bees made it. Accidentally of course, and I’m sure the first human to dip his hands into the hollowed tree for a drink found the effect of fermented honey water quite interesting. And humankind has been chasing the mind altering effects of alcohol ever since.
Friar Pumpernickel chopped fruit while I activated the yeast. We multiplied by five a recipe for one gallon and used a five-gallon water jug, still sealed, effectively eliminating the need sterilize the container. The water provided a known clean source. Tap water, especially in a foreign country, won’t do. We emptied half the water, stuffed in apples, raisins, oranges, and peaches. Then we added the yeast.

Now we had to aerate her. The directions said shake vigorously for ten minutes. Friar Pumpernickel said, “Yeah, good luck with that.” I eyed him apprehensively, looked over at the jug. Replaced the original cap, secured it with duct tape, and I took it to the hallway. I laid it on its side, expressed my apologies, and began briskly kicking the jug around the apartment. This is the only time you’re allowed to handle your mead in this manner! So get all your frustrations out now.

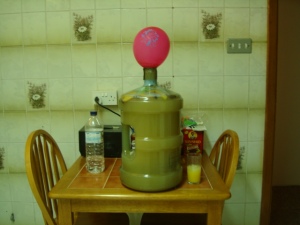
After aerating, and in honor of Robert Boyle, we stretched a balloon across the mouth of the jug to maintain a pristine environment for our newborn, while allowing for expansion and expulsion of excess gases. Within two hours the balloon began to inflate. I mean really inflate! Millions of tiny cells were eating sugars and converting oxygen into carbon dioxide in magnificent cellular respiration! We carefully executed an extremely delicate balloonostomy; we made a needle hole near the top of the balloon to relieve excessive pressure. The balloon properly attached and vented we placed our newborn into elementary school where she learned the way to refinement through exhaustive repetition, or repetitious exhaustion.
At fourteen days the yeast was still in full respiration so we allowed her a few more days. Finally on day eighteen we racked our baby, sending her off to secondary school. At this point we added pureed peaches, four in all, enough to give the remaining yeast something to gnaw. Our young mead studied for another twenty-three days, when on that day we racked her again. Off she went to finishing school.
At forty plus-days her complexion and bouquet have improved dramatically. The yeast scent is gone and her flavor has mellowed from brandy-like to that of a Riesling.
So now we wait for Miss Mead to age. We’re going to rack her again around day seventy-five. Until then we ponder the days of speakeasies and rum runners, and salute those who lifted the first mouthfuls of fermented drink to their lips.
###
10/20/11: An Addendum from the Guest Blogger to fellow mead-making enthusiasts:


Take some time to Google mead and vegan mead. And take a look at the recipe on stormthecastle.com – on the left hand column, look for “Fast Mead Recipe.” There are some steps there that I think are vital to making a traditional mead, steps one must follow, steps not mentioned in modern techniques. The photo of the bottle lying on its side is important in demonstrating one of the steps. Preventing aeration at this point is as important as aerating in the beginning of the process. We really kicked the crap out of our jug, for ten solid minutes, in order to achieve the aeration you see in the first picture. The nice thing about our jug was the handle, it acted as a sort of mixing paddle, very nice effect.We are just beginners at this. So I recommend you do your research. We researched this topic for nearly a year before finally deciding to move forward. 
 
###

{ 0 comments }