≡ Menu

Pina Colada Squares and Giveaway Winner!

Pina_Colada_Bars_-607

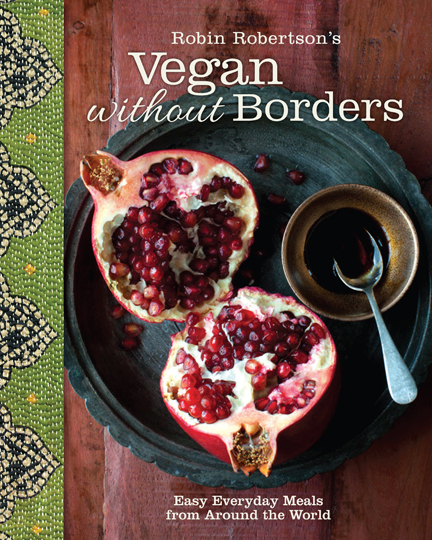
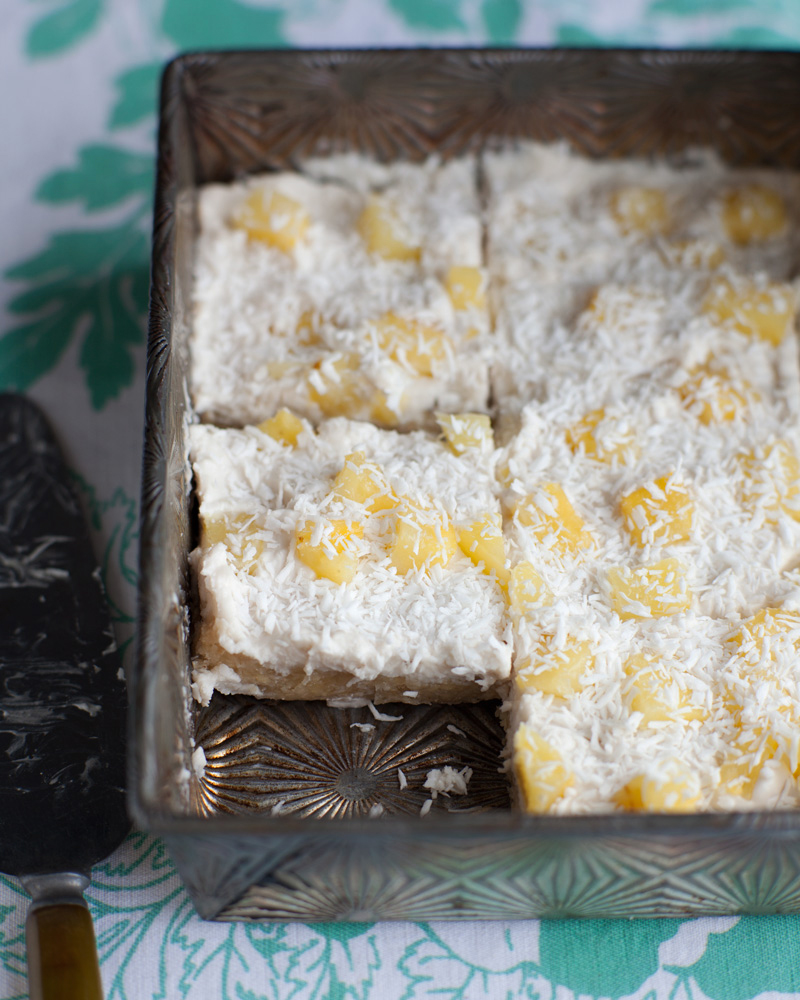
If you’re even half as ready for Spring as I am, you’re doing everything you can to make it happen sooner than later.  One thing I like to do when it’s cold out, is make something tropical and delicious to help me think of warmer temperatures.  These Pina Colada Squares do the trick.  I adore the combination of coconut and pineapple, and a little splash of rum doesn’t hurt either.  I hope you enjoy these tasty treats as much as I do.  They’re simple to make and the recipe comes from my book Vegan Without Borders — you all have that book now, right?  If not you can buy it here — you’ll be glad you did!

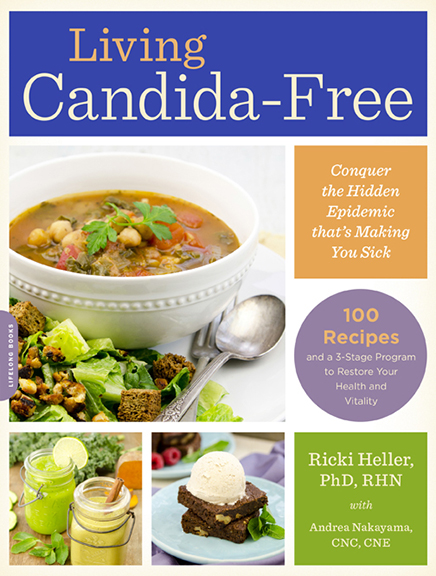
Before I share my recipe for Pina Colada Squares, I’d like to announce the winner of last week’s giveaway.  The winner (chosen at random) of Ricki Heller’s new book, Living Candida-Free, is:  Marika whose favorite sugar-free dessert is Mango Sorbet made with mango and banana — yum — and congratulations!

Marika: Please email me with your address so we can get a copy of the book right out to you!

Now here’s that recipe for Pina Colada Squares….surely Spring is just around the corner…

Piña Colada Squares
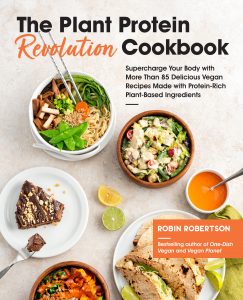
These treats aren’t too sweet if you use unsweetened coconut. Alternatively, you can substitute 2 to 3 tablespoons of sweetened coconut for part of the unsweetened coconut and omit the confectioners’ sugar. If you don’t have dark rum, use 1/2 to 1 teaspoon rum extract and make up the rest of the liquid (to equal the 1 tablespoon) with pineapple juice or a little water or almond milk.  This recipe is from Vegan Without Borders by Robin Robertson © 2014. Published by Andrews McMeel Publishing.
Note: Be sure you use dried pineapple pieces to make the bottom layer (not fresh or canned) or it will be too wet.

Bottom Layer
1 cup dried pineapple pieces
1/2 cup raw cashews or slivered almonds
1/2 cup old-fashioned (rolled) oats
1/2 cup unsweetened shredded coconut
1 tablespoon confectioners’ sugar
1 tablespoon Myers’ dark rum or 1 teaspoon rum extract and 2 teaspoons water or pineapple juice

Top Layer
8 ounces vegan cream cheese, softened
1/4 cup confectioners’ sugar
1 tablespoon Myers’ dark rum or 1 teaspoon rum extract
1 teaspoon coconut extract (optional)
1/2 cup shredded coconut, divided
1/2 cup fresh or canned pineapple chunks, drained and blotted dry

To make the bottom layer, grease an 8-inch square baking pan and set aside. In a food processor, combine the dried pineapple, cashews, oats, coconut, confectioners’ sugar, and rum. Pulse to chop, then process until finely chopped and well combined. The mixture should hold together easily. Press the mixture evenly into the prepared pan. Set aside.
To make the top layer, combine the cream cheese, confectioners’ sugar, rum, coconut extract (if using), and 1/4 cup of the shredded coconut in a food processor. Process until smooth and creamy. If the mixture is too thin, add a little more confectioners’ sugar and process again. Spread the topping mixture evenly over the bottom layer. Sprinkle the top with the pineapple chunks and the the remaining 1/4 cup coconut. Cover and refrigerate until ready to serve. Cut into squares.
Makes 9 squares

VWB new 72dpi 6x7


{ 5 comments }

Ricki Heller’s Grain-Free Apple Berry Crumble and a Giveaway

Living Candida-Free


I’m excited to have Ricki Heller join me today as part of the blog tour for her new book, Living Candida-Free. Today Ricki writes about one of my favorite cooking ingredients: coconut oil and shares her fabulous recipe for Grain-Free Apple Berry Crumble.

But that’s not all…you also have a chance to win a copy of Ricki’s book.  Check out the end of this post for details and enter to win.

Now, here’s Ricki….


Anti-Candida Superstar Food: Coconut Oil

One of the myths about the anti-candida diet is that you can’t have indulgent-tasting food while following it. I love proving to people that nothing could be further from the truth!

Sure, you’ll want to consume foods that will help your body to kill off excess yeast, but surprisingly, there are many delicious foods that can help with that objective. One of the most enticing—and rich-tasting—is virgin coconut oil.

Coconut oil contains both caprylic acid and lauric acid, two powerful anti-fungal agents. And while some people will need to increase their consumption of these compounds with supplements, it’s always a good idea to use real food for healing purposes whenever you can. Enter coconut oil!

Coconut oil is also healthful in general. Although it’s composed mostly of saturated fats, this medium-chain fatty acid metabolizes differently from other saturated fats in the body. As a result, it doesn’t cause the typical negative effects on the cardiovascular system as other saturated fats (say, from animal products).

In fact, coconut oil actually contributes to healthy cardiovascular functioning; it helps to lower “bad” cholesterol levels, improve heart health, boost thyroid function, and even strengthen the immune system. In recent years, there has been evidence that consuming coconut oil may help prevent or reverse Alzheimer’s disease. Not bad for a delicious, versatile, vegetable-based fat!

When it comes to cooking, coconut oil can’t be beat. As a saturated fat, it’s solid at room temperature (it melts just below 76F), so it’s ideal for baking. It’s also extremely stable when heated, so it’s your best bet for sautéing, too. And it doesn’t degrade at room temperature—so there’s no need for refrigeration.

To help prevent or keep candida in check, use coconut oil liberally wherever you’d use another oil. Other coconut products, such as full-fat coconut milk and dried unsweetened coconut, also contain a fair amount of oil, so those can be beneficial, too. Whether for baking, sautéing or as an ingredient in desserts, coconut oil confers a creamy, luscious texture and flavor. And the bonus? You’ll be doing your health a favor, too.


Grain-Free Apple Berry Crumble

Grain-Free Apple Berry Crumble

Good for: Stage 2 and beyond

This fresh, not-too-sweet dessert is a great way to enjoy fruit once you reintroduce it to your diet. Because the topping is grain-free, you won’t need to worry about consuming your coveted grain servings for dessert.

Makes 4 or 6 servings

Filling

  • Coconut oil, for pan
  • 2 small or 1 large sweet apple (I used Gala) or pear, cored and diced very small (about 1/2-inch [1.3 cm] cubes—feel free to leave the skin on)
  • 1 1/2 cups (360 ml) mixed fresh or frozen berries (not including cranberries)—I use strawberries, raspberries, blackberries, and blueberries; if cranberries are included in your mix, use 2 cups (480 ml) total
  • 1/2 cup (120 ml) fresh or frozen cranberries
  • Zest of 1 lemon
  • 1 teaspoon (5 ml) ground cinnamon
  • 2 tablespoons (30 ml) freshly squeezed lemon juice (about 1/2 lemon)
  • 1/4 cup (60 ml) water
  • 30 drops plain or fruit-flavored pure liquid stevia (I use 20 drops lemon and 10 drops cherry-vanilla)
  • 1 teaspoon (5 ml) psyllium husks (optional—it prevents the juices from becoming too watery)

Topping

  • 1/3 cup (55 g) raw natural almonds
  • 1/3 cup (55 g) raw sunflower or pumpkin seeds
  • 2 tablespoons (30 ml) coconut flour
  • 1/16 teaspoon (0.25 ml) pure stevia powder, or 1/8 teaspoon (0.5 ml) pure liquid stevia, or to taste
  • 1 tablespoon (15 ml) ground cinnamon
  • 1/2 teaspoon (2.5 ml) ground ginger
  • 1/8 teaspoon (0.5 ml) fine sea salt
  • 1 tablespoon (15 ml) virgin coconut oil, preferably organic

Preheat the oven to 350°F (180°C). Grease a 4- to 6-cup (1 to 1.5 L) casserole dish with coconut oil.

Prepare the filling: In a large bowl, toss the apples, berries, cranberries, lemon zest, and cinnamon. In a small bowl, mix together the lemon juice, water, stevia, and psyllium, then drizzle over the berry mixture and toss again to coat evenly. Pour the mixture into the prepared casserole dish. (Note: You can just toss everything in the casserole dish instead of dirtying a bowl, but I found the mixture very hard to coat evenly when the ingredients were so cramped in the dish!)

Make the topping: In the bowl of a food processor, blend the almonds, seeds, coconut flour, stevia, cinnamon, ginger, and salt until the mixture resembles fine bread crumbs. Add the coconut oil and process until it’s incorporated.

Sprinkle the topping evenly over the filling in the casserole dish. Bake for 35 to 45 minutes, rotating the dish about halfway through baking, until the topping is lightly browned and the filling is bubbly. Allow to cool somewhat before serving. May be frozen.

From Living Candida-Free by Ricki Heller. Reprinted with permission from Da Capo Lifelong, © 2015. Photograph by Nicole Axworthy.

I have a copy of Living Candida-Free for one person. (U.S. and Canadian residents only, please.) To enter, leave a comment below telling me what your favorite sugar-free vegan dish is. For extra chances to win, follow me on FacebookTwitter, and Instagram and leave a separate comment for each one to let me know.   This Giveaway ends Sunday, March 1, 2015 at midnight, EST.  A winner will be announced on Monday, March 2rd.

THIS GIVEAWAY IS NOW CLOSED.  THANK YOU TO ALL WHO ENTERED.

{ 57 comments }

Butternut Mac and Cheese

Butternut Mac and Cheese

Cozy comfort food has been on my menus lately, and mac and cheese tops the list this weekend.  I plan to make one of our favorite versions, the Butternut Mac and Cheese from Vegan Without Borders. Butternut squash is the secret ingredient in the creamy rich sauce made with cashews and an arsenal of spices. I will most likely add in some cooked green vegetables, such as roasted asparagus or steamed broccoli to make it a one-dish meal.

This recipe calls for steamed butternut squash but, in fact, I usually put aside some roasted butternut squash when I make it with this recipe in mind.  A cup of canned pumpkin puree also fills in nicely for the squash, if you’re pressed for time.

Butternut Mac and Cheese
Few dishes are more classically American than mac and cheese and this version is one of my favorites.  To make this gluten free, use
gluten-free pasta and bread crumbs. This recipe is also soy-free and oil-free. This recipe is from Vegan Without Borders by Robin Robertson (c) 2014, Andrews McMeel Publishing.

1 cup diced butternut squash
8 ounces elbow macaroni or other bite-size pasta
½ cup raw cashews, soaked overnight and drained
2½ cups plain unsweetened almond milk
2 tablespoons freshly squeezed lemon juice
1 teaspoon Dijon mustard
½ cup nutritional yeast
2 tablespoons cornstarch
1 teaspoon salt
1 teaspoon onion powder
½ teaspoon garlic powder
½ teaspoon smoked paprika
¼ teaspoon freshly ground black pepper
¼ cup panko bread crumbs

Steam the butternut squash in a steamer pot with a perforated basket over boiling water until tender, about 8 minutes. Set aside. Cook the macaroni in a pot of boiling salted water until it is al dente. Drain and return to the pot. Preheat the oven to 375°F. Lightly oil a 9-inch baking dish.
In a high-speed blender, combine the drained cashews and ½ cup of the almond milk and process until smooth. Add the cooked squash, lemon juice, mustard, nutritional yeast, cornstarch, salt, onion powder, garlic powder, paprika, and pepper, along with the remaining almond milk and blend until completely smooth and creamy.
Add the sauce mixture to the drained macaroni and stir to combine. Taste and adjust the seasonings, if needed. Transfer the mixture to the prepared baking dish and sprinkle with the panko. Bake for 20 to 30 minutes, or until bubbly.

Serves 4

popcorn bag IMG_0776

Although I won’t be watching the Super Bowl, that’s no reason not to snack!  This Sunday we’ll be munching on GH Cretors popcorn while we watch Downton Abbey. I was lucky enough to get some samples of this popcorn and it’s really delicious.  I think it tastes as good as fresh-popped!  Best of all, this healthy indulgence is made with non-gmo organic corn and is seasoned with olive oil and/or sea salt.  If you see this popcorn, you might want to give it a try.

{ 6 comments }

Hummus Soup + Giveaway Winner

mqfv hummus soup mc

Today’s post is about soup because, well, it’s soup weather!  This time of year, my kitchen usually has a continuing rotation of our favorite bean or lentil soups with lots of vegetables.

Sometimes, however, I just want a quick and easy soup that is also creamy, delicious, and protein-rich.  My recipe for Hummus Soup checks all those boxes and more.

It has all the flavors you love in a good hummus, takes less than 20 minutes to get on the table, and has the added crunch factor with homemade pita croutons. This rich and flavorful soup is from my favorite “quick-fix” book: More Quick-Fix Vegan.  It makes four small servings or two large meal-sized servings.  The recipe doubles easily. (recipe photo by Melissa Chapman)

mqfv

Hummus Soup with Pita Croutons
To make it even quicker, garnish with storebought pita chips instead of making your own. This recipe is from More Quick-Fix Vegan by Robin Robertson © 2014.
Serves 4

2 pita bread loaves
Olive oil (optional)
Salt
1 1/2 cups home-cooked chickpeas, or 1 (15.5-ounce) can, drained and rinsed
2 cloves garlic, chopped
1/2 teaspoon ground cumin
1/8 teaspoon cayenne
2 tablespoons sesame tahini
2 tablespoons freshly squeezed lemon juice
2 cups vegetable broth
2 tablespoons minced fresh Italian parsley or cilantro

Preheat the oven to 350°F. Carefully slice each pita bread into two circles with a serrated knife. Lightly brush olive oil onto the inner side of each circle. Cut the pita circles into 1-inch strips, then stack the strips and cut them into 1-inch squares. Arrange the pieces on a baking sheet in a single layer, oil side up. Sprinkle with salt to taste. Bake until golden brown, about 10 minutes. Set aside.
In a high-speed blender or food processor, combine the chickpeas, garlic, cumin, cayenne, and 1/4 teaspoon of salt. Process until finely minced. Add the tahini, lemon juice, and broth, and process until smooth, scraping down as needed. Taste and adjust the seasonings. If serving at room temperature, transfer the soup to bowls; if serving warm, transfer to a saucepan and heat gently over low heat, stirring, until just hot, then transfer to bowls. Garnish with the pita croutons and parsley.


COOKBOOK GIVEAWAY WINNER!!!!    I want to thank everyone who entered my giveaway to win The Vegetarian Flavor Bible by the brilliant Karen Page.  The winner of the giveaway has been chosen at random and it is:  Michelle P.  Congratulations, Michelle! Please email me with your address so the book can be on its way to you!


{ 0 comments }

I’m very excited to participate in the blog tour for The Vegetarian Flavor Bible with a guest post by Karen Page about one of my favorite food topics: umami.  After you read Karen’s wonderful post, be sure to leave a comment to enter my giveaway to win a copy of this amazing book.

The Vegetarian Flavor Bible

How to Get More Umami Flavor From Plant-Based Ingredients by Karen Page

KarenPageAuthorShotFlowers300dpiWT800 In our 1996 book CULINARY ARTISTRY, my husband Andrew Dornenburg and I were two of the first American culinary authors to mention “umami,” a then-  fledgling concept vying to become known as the “fifth taste.”  The fact that our book became a bestselling classic didn’t hurt umami’s rising profile globally as the Japanese-originated concept of savoriness / deliciousness gained new proponents among our readership of professional chefs.

When we came out with THE FLAVOR BIBLE in 2008 and shared our now infamous “Flavor Equation” that FLAVOR = TASTE + MOUTHFEEL + AROMA + “THE X FACTOR,” the TASTE section featured the four basic tastes of Sweetness, Saltiness, Sourness, and Bitterness, alongside a mention of Umami (Savoriness) with the note, “…There is growing evidence of a fifth taste, umami…It is often described as the savory or meaty ‘mouth-filling’ taste that is noticeable in such ingredients as anchovies, blue cheese, mushrooms, and green tea, and in such flavorings as monosodium glutamate (MSG), which is the primary component of branded seasonings such as Ac’cent.”

By the time we came out with THE VEGETARIAN FLAVOR BIBLE in the fall of 2014, umami had taken its place in the book as one of the five tastes responsible for “every delicious bite you’ve ever tasted…coming together on your taste buds.” Since we started eating a plant-strong diet in May 2012, the concept of umami has taken on even more importance to us we seek its satisfying effects without meat or cheese.

RobinRobertson_UmamiMushroomsInBushel

Where to find umami:  beer, beets, broccoli, carrots, corn, fermented foods (e.g, bean pastes), green peppers, green tea, ketchup, miso paste; mushrooms (dried, e.g., matsutake, shiitake), nutritional yeast, onions (esp. caramelized), peas, potatoes, sauerkraut, sea vegetables (e.g., dried, kombu), soy sauce, spinach, sweet potatoes, tamari, tempeh; tomatoes (e.g., ripe, paste, sauce), truffles, umeboshi plums and plum paste, vinegar (e.g., balsamic, sherry, umeboshi), walnuts, wine (esp. red)


It’s easy when it comes to Asian dishes, such as miso soup with shiitakes, tofu, and wakami, which is an umami bomb.


RobinRobertson_UmamiZucchiniPasta

But what about Italian food?  Pastas with tomato sauce and mushrooms seem to cry out for something to take the place of umami-rich Parmesan cheese.  Happily, some of the Parmesan substitutes we’ve tried seem to be getting better (e.g., Parma brand vegan “Parmesan”), as have been the “cashew ricottas” we’ve been served on pasta dishes (including the zucchini pasta pictured here).

The number-one seasoning in our spice cabinet these days is smoked paprika, which gives legumes an irresistable flavor.  Andrew uses it in marinades for portobello mushrooms as well as seasoning his signature split-pea soup.  Kalustyans.com sells porcini powder made from powdered porcini mushrooms, which you can use to coat tofu as well as to season dishes.

Miso’s umami-enhancing properties are so extraordinary that it was a staple in our kitchen long before we started our plant-strong diet.  Japanese fermented soybean paste is available in as many varieties in Japan as there are types of cheese in the U.S., so it’s incredibly diverse.  We use it exactly the same way as we did as omnivores:  rub your choice of ingredients – such as tofu – with miso paste, cover, and refrigerate overnight.  The next day, wipe off the excess paste before throwing the tofu on the grill or baking it.  You’ll be amazed by its extraordinary flavor. You can mix light and dark misos for more complex flavors.  As another tip, you can add miso to mashed or pureed vegetables and use this as a sauce.

Just as importantly, umami can be created through cooking techniques, such as browning, caramelizing, grilling, roasting, and sauteeing.  The most masterful examples can be found at temples of haute cuisine with celebrated veg tasting menus, such as The Inn at Little Washington and Picholine.


RobinRobertson_UmamiDishAtInn

During what turned out to be the best vegetarian meal of our lives, The Inn at Little Washington in Virginia kicked things off by serving us popcorn with shaved truffles on top – later followed by a “Club Sandwich of Eggplant, Grilled Shiitake Mushrooms and Fried Green Tomato on Charred Onions with Burgundy Wine Sauce.”  At Picholine in New York City, we were wowed by the savory “braised shortrib-esque” qualities of “Grilled and Smoked Eggplant with ‘Chinoise Flavors’ and Tapioca Pearls,” which was served with a crunchy nori tempura accent.

The secret of adding umami to plant-based dishes?  Layering the flavor on, through the right selection of ingredients and application of cooking techniques.  If you’re making risotto, take the time to caramelize the onions and/or butternut squash you add to it.  If you’re making mushroom gravy, add a bit of nutritional yeast – or, better yet, toasted nutritional yeast, to enhance the flavor even further.  Every layer can help you make an even bigger flavor impact!

P.S.  Chef Nathan Lyon developed a recipe for “Vegan Umami Paste” that combines several ingredients renowned for their umami (e.g., balsamic vinegar, molasses, nutritional yeast, porcini powder, soy sauce, tomato paste) that adds wonderful umami flavor to a wide variety of dishes, including the roasted eggplant sandwich featured on his website.

 ~

I have a copy of The Vegetarian Flavor Bible for one person. (U.S. residents only, please.) To enter, leave a comment below telling me what your favorite way to add umami to your food when cooking is. For extra chances to win, follow me on Facebook, Twitter, and Instagram and leave a separate comment for each one to let me know.   This Giveaway ends Wednesday January 14 at midnight, EST.  A winner will be announced on Thursday January 15.

{ 109 comments }

Pissaladiere

Pissadaliere_-088
In keeping with our minimalist theme of this year’s holiday season, I’m taking a break from my usual New Year’s Eve parade of appetizers.  This year I’m only making one dish: a pissaladiere – and a shortcut version at that!
This savory caramelized onion tart hails from Nice in the Provençe region of France. Known for its thick dough and flavorful topping of caramelized onion and luscious Caillette or Niçoise olives, this sophisticated pizza can be enjoyed as an appetizer or main dish.
I’m going to make an adapted version of the pissaladiere recipe from Vegan Without Borders, using a ready-made pizza dough for the crust, instead of making one from scratch.  (I like the dough sold at Trader Joe’s and keep some in my freezer for occasions such as this!)
Here’s my adapted recipe, in case you want to try it for yourself!

Thanks to everyone for making this a great year.  I wish you all a Happy New Year!  See you in 2015!

Short-Cut Pissaladiere
Adapted from Vegan Without Borders by Robin Robertson © 2014.

2 tablespoons olive oil
3 large sweet yellow onions, halved and thinly sliced (about 2 pounds)
1/2 teaspoon salt
1/4 teaspoon black pepper
1 teaspoon herbes de Provençe or dried thyme
1 ready-made pizza dough, at room temperature (I use Trader Joe’s brand)
1/3 cup pitted and halved Kalamata olives

Heat the oil in a large skillet over medium heat.  Add the onions, salt, and pepper. Cook, stirring frequently, until the onion softens and turns golden brown, about 10 minutes. Reduce the heat to medium-low and stir in the herbes de Provence.  Cover and cook 20 minutes longer, or until the onions are soft and caramelized.  Taste and adjust the seasonings, if needed.  Set aside to cool.  Preheat the oven to 425°F. Lightly oil a rectangular baking pan and set aside.
Stretch the dough to fit the baking pan and arrange it on the prepared pan. Spread the onion mixture evenly onto the dough, leaving a 1/2-inch border of exposed dough around the edge. Arrange the olives on top of the onions, spacing them evenly.  Bake for about 16 to 20 minutes, or until the crust is nicely browned.   Cut into rectangular pieces (small or large, depending on how you are serving it) and serve.

{ 6 comments }