≡ Menu

Latkes from Aquafaba by Zsu Dever

Aquafaba by Zsu Dever

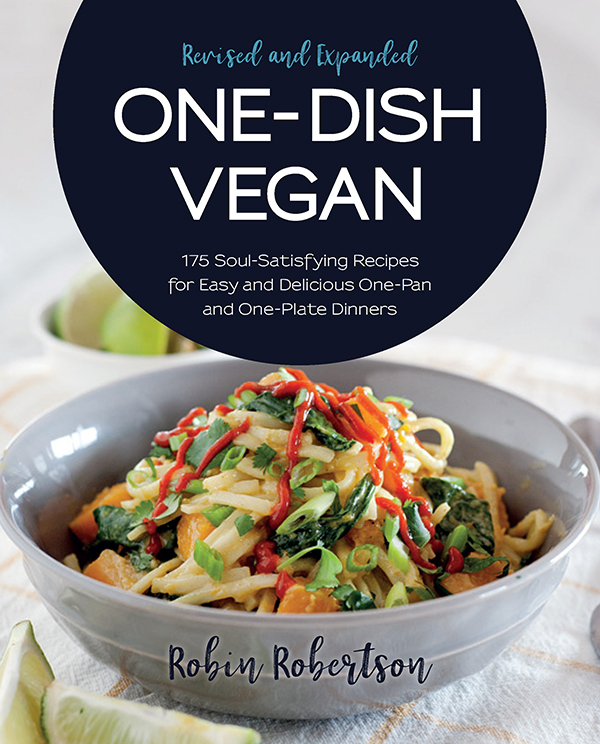
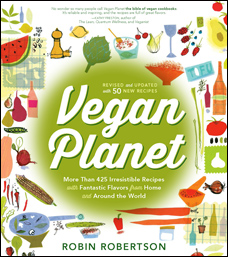
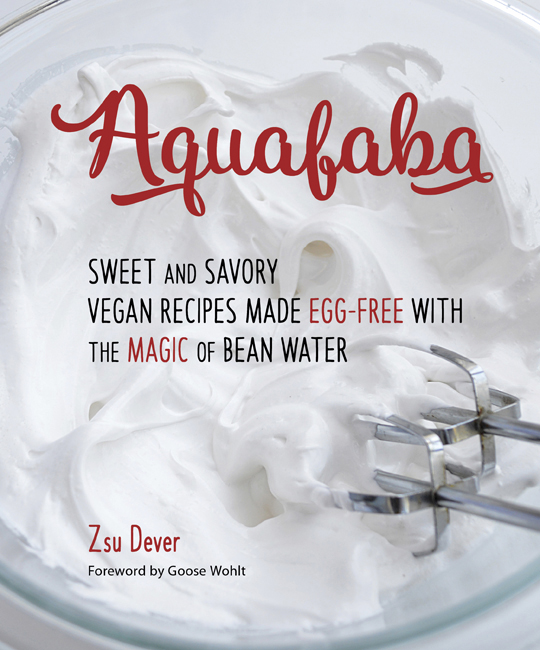
Aquafaba (bean water) is an amazing ingredient that can be used instead of egg whites, making it a boon to vegans everywhere, including those who thought lemon meringue pie was a ting of the past!  In Aquafaba, Zsu Dever’s groundbreaking new cookbook, you will find everything you ever wanted to know about using aquafaba, including a meringue primer, tips and tricks, and Zsu’s fabulous recipes, complete with clear instructions and gorgeous photos throughout.

In this book, Zsu shares her recipe for an amazing lemon meringue pie, airy macarons, and light and luscious chocolate mousse,among other confections.  There are also savory recipes for burgers, quiche, and much more, including the deliciously crisp latkes (below).  In addition, Zsu answers the question “What do we do with all the leftover chickpeas?” with an entire chapter filled with fantastic chickpea recipes such as Curried Caribbean Coconut Chickpeas, Korean Dak Galbi, Pulled Chickpea Seitan Roast, and Shiro Wat.

If you’re interested in learning more about transforming the bean liquid you used to through away into amazing sweet and savory delights, you’ll want to own a copy of Aquafaba.  Now here’s that latke recipe….

Latkes from Aquafaba by Zsu DeverLatkes

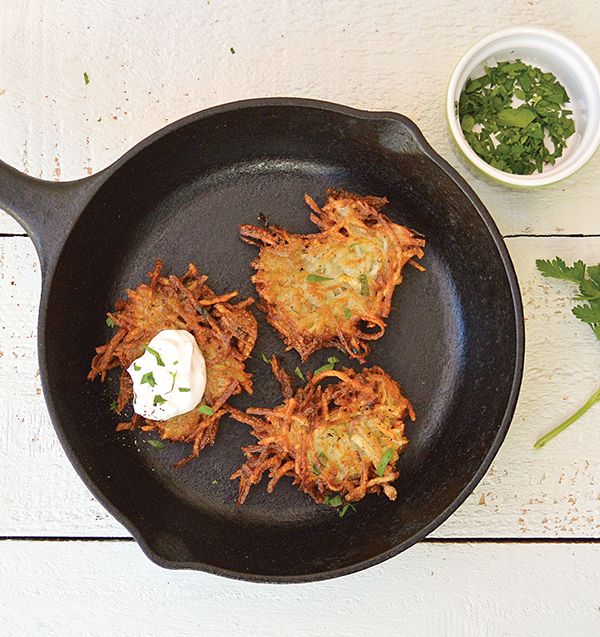
These latkes are perfectly crisp on the outside and melt-in-your-mouth on the inside. The added potato starch increases their crispiness, but it is not essential. Some russet potatoes tend to be on the drier side, but to be safe, place them in a lint-free kitchen towel, fold up the edges and give them a good wring to remove excess water. Serve this the traditional way, with nondairy sour cream and applesauce. (From Aquafaba, copyright © 2016 by Zsu Dever. Used by permission.)

  • 2 pounds russet potatoes
  • 1/2 medium onion
  • 1/4 cup aquafaba (see Note)
  • 1/4 cup potato starch, optional
  • 2 tablespoons minced fresh parsley, optional
  • 1/2 teaspoon sea salt
  • 1/2 teaspoon baking powder
  • 1/4 teaspoon ground black pepper
  • High-heat oil, for frying, such as canola or peanut

Peel the potatoes and shred them using either a food processor with the shredding blade or a box grater. Place them on a kitchen towel, fold up the edges, twist the towel around the potatoes, and squeeze out all the water that you can. Place the potatoes in a large bowl. Shred the onion and add it to the potatoes. Add the aquafaba, starch, parsley (if using), salt, baking powder, and black pepper. Mix very well.

Heat about 1/2 inch of oil in a large skillet over medium heat. Add two or three kernels of popping corn and heat the oil until the corn pops; this is an indicator that your oil is hot enough. Remove and discard the popped corn.

Using a 1/4-cup measuring cup, place 3 to 4 portions of the potato mixture in the hot oil and cook them until golden brown, about 2 minutes. Do not press down on the latkes. Flip the latkes and continue to cook another 2 minutes. Drain them on paper towels and serve as soon as possible. Make sure to give the potatoes a stir before measuring, and do not crowd the skillet or your latkes will not be crispy.

Makes 14 to 16 latkes

Note: Although aquafaba is best if homemade using the recipe provided in the book, you can use aquafaba from canned chickpeas. Use the organic, low-sodium, canned chickpeas and strain off the liquid into a measuring cup using a fine mesh strainer. Note the amount of liquid you acquired, then add it to a medium saucepan and bring to a boil. Reduce to a simmer and cook until the liquid reduces by 1/3. Cool the aquafaba completely before using.

{ 4 comments }

Berry Semifreddo is “So Delicious”

semifreddo-2

When I opened the latest box of tasty treats from the nice folks at So Delicious and saw a container of mixed berry ice cream next to a container of whipped topping, I instantly thought “semifreddo.”

Semifreddo is an ethereal Italian dessert whose name means “half cold” (or semi-frozen). It’s made by combining equal amounts of softened ice cream and whipped cream and then transferring to a mold (or individual molds) and re-freezing.  The resulting confection has a texture that is somewhere between an ice cream and a mousse, but  in my opinion, better than either one.

Since I had just made a batch of fresh blackberry coulis, it was a foregone conclusion that I would make a berry semifreddo topped with the coulis and a spoonful of the leftover whipped topping. (Thanks to Elissa Free for taking the above photo of the Berry Semifreddo.)

This is one of the most easy and elegant desserts there is.  Plus it’s infinitely versatile — use whatever flavor vegan ice cream or sorbet you want in equal proportion to your favorite vegan whipped cream and top with a complimentary sauce, such as chocolate, caramel, lemon, or berry.  Sprinkle on some nuts, if you like, and top with whipped cream and mint.

That’s all there is to it!

Here’s Simon checking out the So Delicious goodies:

simon-so-del-img_2271-crop


{ 4 comments }

Cookout with Summer Squash and Corn Bake

burgers on the grill

This hottest summer on record has put a bit of a damper on our al fresco dining — it’s just been too hot to eat outside.  But that doesn’t mean we haven’t been braving the heat for a few minutes to do some grilling! In addition to many meals consisting solely of grilled vegetables, we’ve also enjoyed a few cookouts featuring the new Beyond Burgers from Beyond Meat, thanks to our dear friends Elissa and Bill who generously ferry otherwise impossibly-to-find vegan victuals out to the countryside from the DC area (one of the new places in the country where they are available).  These vegan burgers may appear almost too meat-like for some people, complete with a pink center, thanks to beet juice. They sure do great on the grill!

burger package

We’ve been serving them with all the fixings, including toasted buns, fresh lettuce, tomato, onion, and condiments.

burgers and buns


burger fixins

And great side dishes including this wonderful cucumber salad Elissa made with fresh-picked local cukes. (Elissa also took all of these food photos, too!)

cuke salad

We also enjoyed these fries I made with my new air-fryer (perfect for no/low-oil cooking + hot weather!)

air fryer fries

Another favorite dish at these get-together has been my merger of two Southern favorites: corn pudding and summer squash casserole. I call it “Corn and Summer Squash Bake.”

corn and squash bake

Anyone familiar with the original knows that in addition to the goodness of the namesake vegetables, these dishes are traditionally loaded with butter, eggs, milk, and other not-so-great ingredients.  I had an idea to combine what I liked best about both dishes into one delicious bake that has all the flavorful richness of the originals without any of the baggage.  Here’s the recipe:

Corn and Summer Squash Bake

2 cups chopped yellow summer squash

1/2 cup minced onion

Salt and ground black pepper

3 cups frozen yellow corn, thawed, divided

2 tablespoons nutritional yeast flakes

2 tablespoons cornstarch

1/2 teaspoon baking powder

1/2 teaspoon onion powder

1/4 teaspoon turmeric

1/4 teaspoon smoked paprika

1 tablespoon ground flax seed + 2 tablespoons warm water

1/4 cup nondairy milk

2 tablespoons minced jarred pimento or roasted red bell pepper

1 tablespoon chopped fresh parsley

1/3 cup panko bread crumbs

1/3 cup shredded vegan cheddar (optional) (I didn’t use any)


Preheat the oven to 425 degrees F.  Spread the yellow squash and onion on a baking sheet lined with parchment paper.  Spray lightly with cooking oil spray and season with salt and pepper to taste.  Roast until the vegetables are soft, about 15 minutes.  Remove from the oven and set aside to cool. Lightly oil an 8-inch baking pan and set aside.

In a food processor, combine the cooled squash and onion with 1 cup of the thawed corn kernels. Add the nutritional yeast, cornstarch, baking powder, 1/2 teaspoon salt, onion powder, turmeric, paprika, black pepper (to taste), flax mixture, and nondairy milk.  Process until smooth and creamy.

Transfer the mixture to a large bowl and stir in the pimientos, parsley, and remaining corn kernels.  Mix until well combined. Transfer the mixture to the prepared baking pan, using a spatula to evenly spread it in the pan.  Sprinkle the top with panko and shredded cheddar, if using.  Bake for 30 minutes or until set. Let it cool for about 10 minutes before serving.

Makes 6 servings


I hope you’re enjoying your summer and managing to stay cool!

{ 6 comments }

Recipe Testing – Closed

361b5c1765696ee3efda1529d9461576

UPDATE:  Due to an overwhelming response (within just 2 hours of posting!) I have been flooded with emails from dozens of volunteers for recipe testing.  As I can only choose a few of you, this call for recipe testers is now CLOSED.  Many thanks to all of you for your interest. 

(P.S. If you’ve sent me an email and don’t hear back from me in the next few days, that means I already have enough testers chosen.  I apologize for not being able to respond to all of you personally.)

~Robin

Wanted: Dedicated and enthusiastic volunteers to test whole-food plant-based recipes between now and September 16th.

If you’re interested, here are some questions to help you decide if it’s right for you:

  • Do you enjoy cooking and cook often?
  • Are you willing test recipes that do not use any oil, salt, or sugar?
  • Are you detail-oriented and good at following recipes?
  • Have you had previous experience testing recipes?
  • Are you willing to provide a critique and photo of each recipe tested?
  • Are you able to test 10 to 15 recipes between now and September 16th?

If you’ve answered “YES” to the above questions and want to help me out with some recipe testing, let me hear from you! Send me an e-mail and tell me why you’d make a good recipe tester. Be sure mention if you’ve tested recipes before and if you can take photos of the recipes you test.

I know there are lots of great recipe testers out there, so let me hear from you no later than Friday, July 22nd. I’m sure it will be a tough decision to choose among so many wonderful cooks. If you’re chosen to be a recipe tester, I’ll e-mail you with the news on or before Monday, July 25th.

I look forward to hearing from you! You can email via the “Contact Robin” page on this website — just click “Contact Me.”

{ 4 comments }

Chilled Glass Noodles with Snow Peas


glass noodles 100 best

I just realized it’s been over a month since my last post — I guess I must be really busy or having a lot of fun.  Actually, it’s been a little of both.  During these hot summer days I’ve been favoring chilled make-ahead meals that I can get ready in the morning.  It’s great to have a satisfying meal ready to eat at the end of the day.

One of my favorites is this recipe for Chilled Glass Noodles with Snow Peas and Baked Tofu.  The recipe is from my latest book, 100 Best Vegan Recipes. (Thanks to Zsu Dever for the photo.)

This light but satisfying salad should be prepared at least 30 minutes ahead of time for the best flavor. Made from mung bean flour, glass noodles are also called cellophane noodles, bean thread noodles, and harusame. You can make your own marinated baked tofu or buy it ready-made at well-stocked supermarkets and natural foods stores. Look for one marinated with Thai or Asian flavors for best results. If you’re not a fan of tofu, leave it out and add cooked shelled edamame instead. (You can also sub other veggies for the sno peas — it’s great with lightly steamed broccoli!)

Here’s the recipe.  I hope you enjoy it!


CHILLED GLASS NOODLES WITH SNOW PEAS AND BAKED TOFU

This recipe is from 100 Best Vegan Recipes by Robin Robertson (c) 2016.

4 ounces glass noodles

1 (8-ounce) package marinated baked tofu, cut into 1/2-inch dice (or 1 1/2 cups cooked shelled edamame)

1 1/2 cups snow peas, trimmed and diagonally cut into 1-inch pieces (lightly blanched, if desired)

1 English cucumber, peeled, seeded, and thinly sliced

1 carrot, grated

1/4 cup minced scallions

2 tablespoons chopped fresh cilantro

1/2 cup unsalted roasted peanuts, crushed or chopped

3 tablespoons dark (toasted) sesame oil

2 tablespoons fresh lime juice

2 tablespoons rice wine vinegar

1 tablespoon soy sauce

1 garlic clove, minced

1 teaspoon sugar


  1. Bring a saucepan of water to a boil. Add the noodles and remove from the heat. Let the noodles soak in the hot water until soft, 8 to 10 minutes. Drain well and rinse under cold water. Cut the noodles into thirds and place them in a large bowl. Add the tofu, snow peas, cucumber, carrot, scallions, cilantro, and peanuts. Set aside.
  2. In a small bowl, combine the sesame oil, lime juice, vinegar, soy sauce, garlic, and sugar, stirring to blend well. Add the dressing to the salad and toss gently to combine. Refrigerate for at least 30 minutes to chill before serving.


{ 0 comments }

Stovetop Mac and Cheesy + Giveaway Winners

Mac and Cheesy Lucy Schaeffer

Today’s recipe is for my quickest and easiest mac and cheese — it’s the one I make when I don’t want to dirty the blender or turn on the oven or use a ton of ingredients.  Even though the recipe calls for two pots, I confess that I usually make it in just one pot (allowing the macaroni and broccoli to sit in the colander after draining while I make the sauce in the same pot and then add them back in).  I’ll share the recipe in a minute, but first, let’s get to the business at hand: announcing the two winners of the spectacular two-book giveaway!

One copy of Esther the Wonder Pig + one copy of Baconish with go to: Stephanie, who loves plant-based bacon on a BLT with avocado!

AND …. to double the pleasure of this great two-book giveaway, a second set of these two books will go to: Jennifer — who loves her plant-based bacon on Loaded Potato Soup!

Congrats to Stephanie and Jennifer — please contact me ASAP with your mailing addresses and I’ll see that the books get out to you both pronto. Thank you to all who entered the giveaway — I hope you get ahold of both of these books — I highly recommend them!

Now, how about some Stovetop Brocolli Mac and Cheesy???


STOVETOP BROCCOLI MAC AND CHEESY

Serves 4

This quick and easy cheesy mac is made on top of the stove, so there’s no need to heat up the oven. However, if you don’t plan to serve it right away, you can always put it in a casserole dish and keep it warm in a low oven. This recipe is from 100 Best Vegan Recipes by Robin Robertson © 2016. Photo (c) Lucy Schaeffer.


12 ounces elbow macaroni or other bite-sized pasta

4 cups small broccoli florets

3/4 cup nutritional yeast

1/3 cup all-purpose flour

2 cups plain unsweetened almond milk

1 tablespoon soy sauce

1 tablespoon fresh lemon juice

Salt and freshly ground black pepper


  1. Cook the macaroni in a pot of boiling salted water, stirring occasionally, until it is al dente. During the last 2 or 3 minutes of the cooking time, add the broccoli to the pasta and cook until it is almost tender.
  2. In a saucepan over medium heat, combine the nutritional yeast and flour, and cook, stirring, for 1 minute. Slowly add the almond milk, stirring until smooth. Add the soy sauce, lemon juice, and salt and pepper to taste. Continue stirring until smooth and thickened.
  3. When the pasta and broccoli are cooked, drain and return to the pot. Add the reserved sauce and stir until well mixed. Serve hot.


{ 6 comments }